About this blog:

I am a teacher who likes to cook (and eat.) I am constantly being asked for the recipes to dishes I share with my colleagues, parents or students. This is my place to present them. Many of the recipes I post are borrowed from other sources which are given credit. I tend to tweak most to simplify the cooking process or lessen the cost. Let me know what you think by leaving me some comments. Happy cooking!

November 25, 2022

Mom's Old-Fashioned Turkey Stuffing


While growing up in the 60's, this would be the turkey stuffing my mom made for every family Thanksgiving gathering we hosted. All the prep work was done the night before. Then early the next morning, Dad would bring up the roasting pan liner, all the seasonings from the cupboard, all the baggies filled with ingredients from the fridge, and pile them on our big circular kitchen table. He would then wake Mom up, pour her a big cup of coffee and proceed to open, rinse, and prepare the turkey. One of us boys would be there to assist whenever we could (if the parade was over and there weren't any cartoons on TV.) It was always a special tradition in our family. 

Mom's Turkey Stuffing

  • 2 loaves  - white bread, cut into 3/4” cubes
  • 1 large  - onion, finely chopped
  • 2 stalks  - celery, finely chopped
  • 1  - medium apple, chopped
  • 2 Tbl -  poultry seasoning (to taste)
  • 1 1/2 tsp salt (to taste)
  • 1 tsp - pepper (to taste)
  • 1 stick butter, melted
  • 2 large eggs, lightly beaten
  • 1-2 cups chicken broth or water
Occasional mix-ins:
  • turkey gizzards, heart and liver (raw) chopped or
  • 8 oz. oysters (raw), chopped or
  • 1 cup chestnuts (roasted) chopped
In a large enough bowl (or roasting pan liner), mix together the bread, chopped vegetables, and apples. Use light pressure to avoid compacting the bread too soon. Sprinkle the mix with the seasonings and mix again to thoroughly coat all the bread cubes. Sprinkle the melted butter, mix. Add the beaten eggs, mix. Then add just enough water/broth to be able to form a moist ball with light pressure.  Taste for seasoning and adjust. Stuff your turkey and roast as you would normally cook a stuffed bird.

September 25, 2018

Mrs. Thomas's Legendary Apple Crisp

In the 1960's/70's, Mrs. Thomas was my grade school Principal's wife and the school's cook/lunch lady. She was a saint. Spending long hours, with no budget and little or no pay, yet cooking up all the marvelous kitchen miracles we kids all loved. Everything was deliciously good, but one thing stands out as the ultimate favorite of all students from Kindergarten to 8th grade - her Apple Crisp dessert. It was always the gastronomic highlight of the week. Many, many years later we still talk about it (with much love).  This recipe comes from a copy she wrote out for me years ago.

Ingredients:
6 Medium-sized apples 
3/4 c. Brown sugar
1 c. Flour
1 c. Rolled oats (Not quick oats)
3/4 c. Margarine (cause that's what she used.)
1 tsp. Cinnamon
1/2 tsp. Salt

Directions:
Start with a firm, sweet/tart variety of apples such as Braeburn, Honey Crisp or Jonathan. Peel then slice the apples medium thick. You will want enough to fill about 3/4 of the way up your well-buttered 9x9 pan. Mix the all other ingredients in a separate bowl until crumbly. Spread completely over apples (in big and little crumbles) and bake uncovered for 35 minutes at 350 degrees.

April 29, 2018

Mother Wonderful's Almond Amaretto Cheesecake

My father-in law lived in Philadelphia and used to attend the annual Book and the Cook event Philadelphia for many years. In 1990 he bought me a cookbook that would make me a very popular person - Mother Wonderful's Cheesecakes and other Goodies by Myra Chanin. Filled with cheesecake recipes of the highest quality and taste, it is by far the most used and abuse book in my collection. Over the years I've attempted to make many a recipe from the book, but one stands out by far as the best cheesecake I have ever made or eaten and most requested by friends and family when it's my turn to bring dessert. Thank you Ralph for buying us the book and thank you Mother Wonderful for the joy this recipe has brought to so many people over the many  years.

Equipment needed:
Stand mixer with paddle attachment (or food processor)
8" Springform Pan

If you want to make a bigger cake, use a 10" springform pan and double the recipe

Preheat oven to 350° F.
Crust
4 tablespoons (1/2 stick) - Lightly Salted Butter
1 cup + 2 tablespoons - Finely ground Italian amaretto biscuit crumbs
Sugar - 2 tablespoons

Melt butter over very low heat. Combine butter with crumbs and sugar in a food processor or with a fork until thoroughly blended. Press small amounts of crust mix up the sides of an non greased 9-inch springform pan and then press remaining crust mix over bottom. (I wrap the outside bottom/sides with a few sheets of aluminum foil to avoid melted butter dripping onto the bottom of your oven.)

Filling
1 lb. (Two 8-ounce packages) - Cream cheese
¾ cup - sugar
1 ½ teaspoons - Amaretto liqueur
½ teaspoon – Vanilla extract
½ teaspoon – Almond extract
pinch – Salt
2 – Large eggs

In a mixer, whip cream cheese on the highest speed for 5 minutes, then add sugar and beat for 2 minutes more. Add liqueur, extracts, and salt and blend together thoroughly. Add the eggs, one at a time, keeping the mixer on the lowest speed in order to prevent too much air, from destroying the proper consistency of the batter; mix just until each egg has been incorporated into the batter. Pour batter into crust and bake in preheated oven. 40 minutes
Remove from oven and let stand on a counter for 10 minutes allowing the center to solidify while you prepare the glaze.

Sour Cream Glaze
1cup – Sour cream
2 tablespoons – Sugar
½ teaspoon – Almond extract
¼ cup – sliced almonds

Combine sour cream, sugar and extract together in a bowl. Spread evenly and smoothly over the top of the baked filling, sprinkle with almonds and return to the 350° F oven for 10 minutes. Remove from oven and immediately place in the refrigerator to cool and prevent cracks from forming on the cake. Cheesecakes are best made a few days in advance to develop firm creaminess and mellow flavors while in the refrigerator.

December 31, 2016

Tamales - Like Granny Used to Make


My wife's step-father is Mexican-American, so she grew up making tamales as part of her annual holiday celebration. We not only continue that tradition in our (gringo) family, most of our Hispanic relatives think ours are (almost) as good as Granny used to make.  Making tamales isn’t so much about following a recipe but rather about understanding the process, learning, and then applying the techniques. Although a tamales may be prepared in many diverse ways, the recipe below is for traditional Mexican style tamales made with pork based on Granny's recipe. I have been 'winging it' for years using handfuls, pinches and approximations until my brother, Bob, had me over to show him how it's done. He observed, measured, mixed, blended, and cooked alongside me, writing each step down along the way. Thanks Bob for your perserverence, typing skills, (and anal-retentiveness).


Prep 
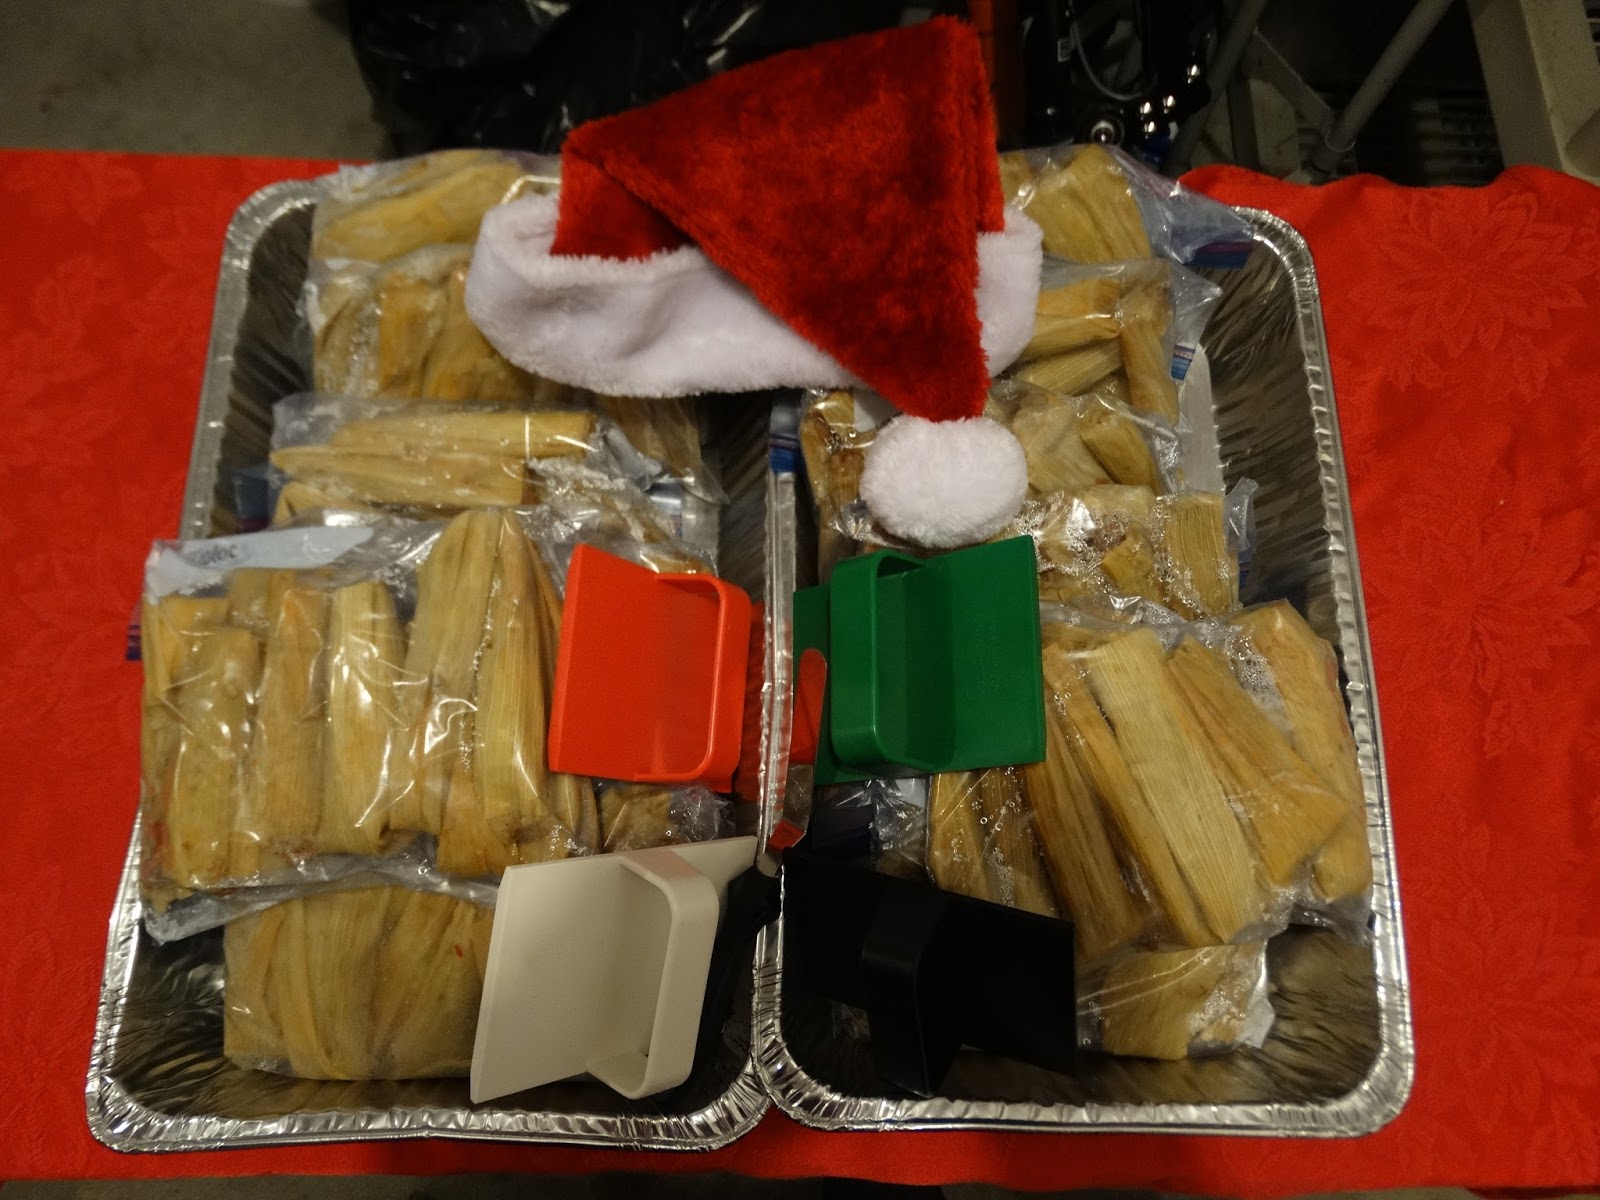
Time: Forever and a Day (but worth it) Yield: 4 dozen tamales

There are 4 basic steps involved when making a batch of tamales.
Preparing the meat filling (usually prepared the day before all else)
Preparing the masa harina dough which will be used to coat the corn husks “wrappers” before steaming the tamales. Masa harina (“corn flour” in Spanish) is specially processed and ground cornmeal.
Assembling the tamales
Cooking the tamales

INGREDIENTS FOR ABOUT 48 TAMALES (Depending on amount of filling desired)
(Day 1) Pork Filling:
8 – 10 dried ancho chilies, stems and seeds removed (Kitchen shears and cooking gloves are recommended.)
4 tbsp. – ground Mexican cumin (comino molido)
1 large head – garlic (crushed and paper skins removed)
2 – tbsp. salt
8 lbs. of untrimmed pork butt or pork shoulder makes about 4-dozen tamales.
Approximately 2 gallons of water (just enough to cover the meat)
(Day 1) Miscellaneous Ingredients:
1 large package dried corn husks
(Day 2) Masa harina dough:
4 cups masa harina mix for tamales. (I use Maseca brand.)
10 oz. by weight, or approximately one and a third cup – lard.
2 tbsp. baking powder
1 tbsp. salt
Approximately 1 cup of reserved cooking liquid from Day One (warmed slightly in a microwave)

PREPARATION – DAY 1 (The Day before Assembling and Cooking Tamales)
Cooking the pork (prepared the day before assembling the tamales):
Cut each pork butt or shoulder into 4-5 chunks and place in a large pot. Leave fat on the meat.
It will be easier to remove once the pork has been cooked and cooled.)
Add the garlic, dried ancho chilies, salt, Mexican cumin and enough water to cover the pork.
Bring ingredients to a boil then reduce heat and simmer for 2½ hours (covered).
Let the mixture cool for 1 hour.
Using a spider strainer, a slotted spoon, or a sieve carefully remove the meat from the broth.
(If handled too much, the meat will fall apart, so take care when removing the chunks of pork.)
Cover the cooked pork with aluminum foil and chill until ready to use.
Likewise, remove, drain and reserve the ancho chili peppers and the garlic heads. (These will be used in preparing the meat filling.)
Strain the remaining cooking liquid into a large container and place in a cold location overnight. (When cold, the fat in the broth will congeal at the top of the mixture for easy removal). Discard the fat layer.
Keep this broth in a cold place until ready to use. Soak the corn husks in cool water overnight.

PREPARATION – DAY 2 (Assembly and Cooking)
Pork filling preparation (prepared the day of the tamales assembly):
In a food processor, blend together the reserved cooked garlic/ancho chili peppers until they form a smooth paste
Trim the meat, removing as much of the fat as possible. Discard any remnants of bones, fat, sinew etc., leaving only the meat. Gently scraping away embedded fat from pieces of chilled meat with a knife is a good way to remove the fat.
Cut the trimmed meat across the grain into 1/3” to 1/4” slices
In a large bowl (or on a clean work surface) add the following to the meat (to taste):
o approximately 1 tbsp. black pepper
o approximately 1 tbsp. salt
o 2-4 tbsp. of Mexican cumin
o the blended chilies and garlic paste
o Just barely enough of the reserved pork broth to moisten the mixture slightly. (You’ll want to be able to form the pork mixture into a cigar shape and not have it crumble apart.)
Using your meticulously cleaned hands, mix in the above ingredients until completely incorporated into the meat. (Meat should now be of a consistency resembling a thick, coarse paste, but still a little chunky – something like hamburger meat.)
Set meat mixture aside while you prepare the masa
Masa Harina preparation:
Beat the lard with a heavy duty mixer on high speed until smooth and somewhat glossy and then set aside.
Combine the masa harina, baking powder and salt in a mixing bowl until blended
Add one cup of the broth to the dry ingredients and mix together well. (Using your hands works best.)
By small handfuls, beat the masa mixture into the beaten lard at high speed. One of the biggest
mistakes in making the masa dough is not mixing long enough; this causes the tamales to fall apart. Keep mixing the masa dough until a small amount (1 tsp) will float in a cup of water. (The mixture should be of a consistency of hummus.) If it is too wet, add more masa harina. If it is too dry, add some of the reserved broth.
Tamale Assembly:
The corn husks should only measure 4-5 inches across; larger ones can be torn to size, smaller ones may be overlapped. Position your corn husks with wide end toward you and spread with a thin layer of masa dough, completely covering the bottom 2/3 of the corn husks (on the smoother side). Use a masa spreader, spatula, butter knife, or the back of a large spoon. The masa should be thick enough so that you cannot see through to the shuck, but no thicker.
With your hands pick up a 1-2 tbsp.-sized portion of the meat mixture, roll into a cigar shape and then place down the center of the masa dough.
Carefully roll up the corn husk with the meat mixture inside.
Fold down the top 1/3 of the corn husk (the portion with no masa) and set the tamal aside with the folded end down.
When you have made enough tamales for a cooking batch, stand them up in a tamale steamer (folded side down) until the pot is full. Cover with a clean tea towel and steam for 1 hour (after you observe steam escaping from the pot). Try to keep the tamales as upright as possible. Hint: If you place a clean penny in the bottom of the pot, you will hear it clanging around as the water boils. If you no longer hear the penny, you need to add more water to the pot.
After steaming for one hour, remove pot from heat, cool slightly and remove the tamales one- at-a time. While still hot, the tamales are very soft so take care not to squash them when removing from the cooking pot.
When completely cooled, place the tamales in freezer bags and freeze until ready to use.

Tamales frozen in this manner should keep one year in your freezer. 

April 8, 2014

Zuppa Toscana (just like at Olive Garden)

This recipe that got me through this past cold, snowy, never-ending winter. It's very close to the delicious soup served at the Olive Garden. It goes together fast, is filling and fairly inexpensive.
  •  1 lb. sweet turkey Italian sausage
  • Large pinch red pepper flakes
  • ¼ cup bacon bits
  • 1 large onion, chopped
  • 2 large cloves fresh garlic, minced
  • 16 oz. chicken broth
  • 1 quart water
  • 2 large russet potatoes cut in quarters lengthwise then sliced
  • 1 cup whipping cream
  • 1 bunch fresh Tuscan (flat) kale, washed well, chopped and tough stems removed
  • Salt and pepper
Brown sausage in your soup pot; then add the pepper flakes, bacon, onion and garlic and sauté for a minute or two.  Add chicken broth and water and stir then add the potatoes. Cook on medium heat until potatoes are tender (about 10 minutes).  Add the kale and cream then salt and pepper to taste. Heat until kale is tender but still bright green. 

November 28, 2012

Leftover Turkey & Cranberry Pizza


I love turkey (and who doesn’t!) I want the aroma of roasted turkey in my house at Thanksgiving and bags of leftovers in my refrigerator for days afterward. But usually, my sister-in-law hosts the family Thanksgiving feasting at her house and there are never any leftovers.  We, however, always cook a turkey at home on that weekend as well. We then go through the usual dishes – turkey salad, hot turkey sandwiches, sometimes even turkey croquettes.  We discovered this gourmet left-over turkey pizza recipe from the Ocean Spray Cranberry recipes website a few years ago. It is now a family favorite - quick, easy to make and very, very good. 

Ingredients
16-ounce precooked pizza crust (Boboli is the best)
16-ounce can Whole Berry Ocean Spray Cranberry Sauce
3/4 cup sliced green onion
8-12 ounces of shredded Monterey Jack cheese
¼- ½  pound leftover turkey

Preheat oven to 375 degrees. Place prebaked pizza crust on an ungreased baking pan and Spread the cranberry sauce evenly over it. Sprinkle with green onion then the cheese. Top with turkey. Bake for 10 -12 minutes or until heated through and cheese has melted

September 1, 2012

NISU - Finnish Sweet Bread

Here is another recipe inspired by my trip with my pals up north this summer. Once again, our breakfast at Suomi's Bakery and Restaurant in Houghton introduced another breakfast treat that I just HAD to make myself.  Nisu is a sweet Finnish cardamon bread that is fairly easy to make and smells (and tastes) heavenly.  It can be eaten warm with butter or made into great French toast.  This recipe makes two loaves.  Eat one fresh and freeze one for later.


Ingredients
1 ½ Tablespoons of active dry yeast (2 packages)
1/2 cup warm water, 105 to 115 degrees
1 teaspoon  sugar (for the yeast)
1/2 – 1 cup of sugar (depends how sweet you want it.)
1 can evaporated milk – warmed (105 to 115 degrees)
2 teaspoons salt
2 – 3 teaspoons ground cardamom
4 eggs, room temperature
7+ cups all-purpose flour
1/2 cup melted butter

For the glaze:
1 slightly beaten egg
2 tablespoons cream (or half & half)


   In a stand mixer; mix warm water, yeast, and 1 teaspoon sugar.Let stand for 5 minutes until yeast gets bubbly. Add warm milk, remaining sugar, salt, cardamom, eggs, and half the flour. Mix until the dough is smooth and shiny. Beat in the melted butter. Add remaining flour, one cup at a time until dough is stiff, but not dry. (You may need a little more than 7 cups but no more than 8.)  Let dough rest for 15 minutes. Using your mixer’s dough hook or your own strong arms - Turn dough onto a lightly floured surface and knead until smooth (about 10 minutes.)

   Add dough to a large bowl sprayed with oil and spray the top as well. Cover with plastic wrap and a kitchen towel and let rise in a warm place until doubled in volume, about 1 to 1 1/2 hours. Turn risen dough out on a bread board and divide into two equal portions. 
   Divide each portion into three parts. Roll each part out to a rope about 2 feet long. Make two braids, using three strands each. Place each braid on a separate baking sheet lined with parchment. Cover and let rise until doubled, about 1 hour. 

   Preheat oven to 375 degrees F. Mix milk and eggs and brush each braid with the glaze. Bake 20 to 25 minutes until golden. Allow to cool for 10 minutes on cooling rack.


August 25, 2012

Pannukakku - From up dere in da UP doncha-know


In 1970, I went with my boy scout troop on a trip to the UP.  Forty-two years later, I had the great pleasure of travelling with a few of my boy scout buddies on that same trip.  We had a great time exploring the 'Yooper Wonderland' ~ Michigan's Upper Peninsula.  Some of the next few posts were inspired by the people and places we had the pleasure discovering.


While in Houghton, we ate at Suomi's Home Bakery and Restaurant, a local hang out specializing in Finnish dishes (especially breakfast.) Pannukakku is similar in taste to a Swedish  pancake except it is oven baked and more like a custard.  Super simple to make (especially in a food-processor) and very, very tasty.


Ingredients:
4 cups milk
4 eggs
1/2 cup sugar
1 teaspoon salt
1 teaspoon vanilla
1 cup flour
4 tablespoons melted butter

Directions:
Beat eggs then add everything else (melted butter last). Mix well and pour into a greased 9x13 pan. Bake at 400 degrees until the custard is set and browned on top (40-45 minutes)  Serve with powdered sugar and your favorite jam or jelly. 

April 26, 2012

St. John's Lutheran Ladies Marvelous Meatloaf


This very simple but delicious meat dish is a staple, served by the ladies at St. John’s Lutheran Church in Waltz, Michigan for most of their big group functions.  My dear friend, Elsie, one of the many hard-working ladies that volunteer to cook at funerals, dinners and other such events, gave me a copy of the recipe that they use. I had to convert it from 100 servings to a reasonable 6-8 servings.  This tried and true recipe is the only meatloaf my big brother Bob will eat (and he’s a very persnickety eater.)  Thank you St. John's for many good friends, all the great memories, (and this delicious recipe.)

1½ lbs. lean ground beef
½ lb. ground pork
2 eggs
1½ cups tomato juice
1 cup oatmeal
4 tsp. dried onions
3 dashes pepper
1½ tsp. salt

Directions: Mix all the ingredients; form into a loaf, place into a loaf pan and spread the top generously with ketchup, the cover with foil. Bake for approximately 1 hour at 350° F. Remove foil for the last 20 minutes of baking time.

December 10, 2011

Bunny Nelson’s World Famous Jello Salad

This recipe, which has been around forever, was featured on Jello boxes in the 70’s.  My mother made it for every family gathering.  At my first teaching assignment, in California, I was asked to bring something to a staff dinner party, and this simple gelatin salad (which was obviously NOT invented by my mother and NOT all that famous) became a BIG hit.  But it was so popular, that “Bunny Nelson’s World Famous Jello Salad” was featured, years after I had left, in the congregational cook book.  This can be made a day ahead, quickly unmolded, and served.


  • 1 (6 ounce) package Strawberry/Banana JELLO®
  • 1 cup boiling water
  • 1 (10 ounce) packages frozen sweetened sliced strawberries, partially thawed
  • 1 (20 ounce) can crushed pineapple, drained
  • 2 just-ripe-but firm bananas
  • 2 cups sour cream

Dissolve the Jello into the hot water, let cool to room temperature then add all the fruit.  Pour half the mixture into a jello mold and refrigerate until partially set. Spread the sour cream, then layer the rest of the mixture and refrigerate until set.  Unmold and serve.

August 28, 2011

Fresh Tomato-Phyllo Pizza

There is nothing like a home-grown tomato. In the fall, just as school gets started, we look forward to fresh off the vine tomatoes from our patio garden (and generous friends).  We eat them like candy.  We also make this phyllo pizza several times during the season.  It was the very first recipe from the very first show I ever saw on Food Network - Sara Moulton’s Cooking Live from back in 1996.  It has been a favorite of ours ever since.  And if you are REAL adventurous, try substituting 3/4 cup fresh goats cheese, (chevre) for the mozzarella.

6 Tbsp -  Unsalted butter melted, kept warm
7 sheets - Phyllo dough (17" by 12") 
8 Tbsp - Freshly-grated Parmesan 
¼  lb -  Mozzarella coarsely grated
1 cup - thinly sliced onion 
5 or 6 - tomatoes (cut ¼” slices) 
1  tsp - fresh (or ½  tsp  dry) herbs (thyme, oregano, or basil) in any combination
Salt & pepper to taste

Stack the phyllo between sheets of wax paper and cover with a dampened kitchen towel. Brush a baking sheet lightly with some of the butter, lay on one sheet of the phyllo and brush it lightly with some of the butter. Sprinkle the phyllo with 1 tablespoon of the Parmesan, lay another sheet of the phyllo on top, and press it firmly so that it adheres to the bottom layer. Butter, sprinkle, and layer the remaining phyllo and Parmesan reserving 1 tablespoon Parmesan. Sprinkle the top sheet of phyllo with the mozzarella, scatter the onion evenly on top, and arrange the tomatoes in one layer over the onion. Sprinkle the pizza with the reserved 1 tablespoon Parmesan, the herbs, and salt and pepper to taste and bake it in the middle of a preheated 375 degree oven for 30 to 35 minutes, or until the edges are golden. Using a pizza wheel or sharp knife cut the pizza into squares.

July 13, 2011

What's a Nanaimo Bar?

This easy no-bake dessert bar is a source of Canadian pride which may or may not have originated in British Columbia is the 1930’s (or 50’s).  In any case, it is sweet, chocolately, sweet, easy to make, sweet, and quite tasty.  My son actually asked for this for his birthday treat instead of a cake – then proceeded to eat most of it himself. I only wish I knew the recipe for the Nanaimo-style Saskatchewan bars from Dog River, but Emma doesn’t share her secrets. Try this one it’s well worth it. 


Bottom Layer
½ cup unsalted butter
¼ cup sugar
5 tbsp. cocoa
1 egg beaten
1 ¼ cups graham cracker crumbs
½ c. finely chopped almonds
1 cup shredded coconut
Heat the first 3 ingredients in microwave until just melted. Temper the egg with a few spoonfuls of the melted chocolate then add it into the rest of the mixture. Stir over low heat to cook and thicken. Remove from heat. Stir in crumbs, coconut, and nuts. Press firmly into an ungreased 8" x 8" pan.

Second Layer
½ cup unsalted butter
3 Tbsp. heavy cream
2 ½  Tbsp. vanilla instant pudding powder
2 cups powdered sugar
Cream all of the above together well. Beat until light. Spread over bottom layer.

Third Layer
4 oz. semi-sweet chocolate chips
2 Tbsp. unsalted butter
Melt chocolate and butter over low heat. Cool. Once cool, but still liquid, pour over second layer and chill in refrigerator.

March 15, 2011

Fast (and Easy) Fudge

I love chocolate fudge.  This is the easiest recipe EVER. I use it for demonstration in class during our annual Chocolate Week in 4th grade.  It takes five minutes to make and less than an hour to harden and the class LOVES it!

3 Cups - semi-sweet chocolate chips
1 can (14 oz.) - sweetened condensed milk. 

Melt the chips is a medium saucepan then pour in the can of milk and stir until combined.  Spread into a 8x8 pan sprayed with cooking spray then cool for one hour.  Cut and serve.  (Told you it was easy!)

January 21, 2011

Ann Sather Swedish Pancakes

My sister-in-law and her family lives in Chicago. The city is a food paradise with a million great places to eat for lunch and dinner. For us, however, there is only one place to go for breakfast - Ann Sathers Restaurant. Locals know that any one of their locations will deliver a great morning meal that will satisfy your hunger and stick with you for quite a while. There is often a line outside the door but it's worth the wait, especially for their signature dish - Swedish pancakes with home-made lingonberry syrup. Since we don't live in the Windy City, this make-at-home version is very, very close to being there (without the wait).


- 1 2/3 c all purpose flour
- 1 c sugar
- 1/4 c non fat dry milk powder
- dash of salt
- 4 eggs; slightly beaten
- 2 c water
lingonberry (or other) jam and/or dairy sour cream to top it off


In a large mixing bowl mix the dry ingredients together.  In another mixing bowl, combine eggs and water. Then add to dry ingredients. Whisk it until thoroughly combined and smooth. Heat a lightly greased non-stick skillet (sloped sides) over medium heat till a drop of water sizzles.
For each pancake, pour ¼ cup batter into the pan and tilt the pan till batter coats the bottom of pan. Cook over medium heat till the tops appear dry and the bottoms are brown (1 to 1 ½ minutes). Flip pancakes to brown other sides (20 to 30 seconds).  Serve immediately with lingonberry or other jam and sour cream.
Makes 16 large pancakes.

September 25, 2010

Authentic Chicken Shawarma

I knew I could do hummus at home (see previous post), but what about my favorite Lebanese dish - chicken shawarma?  A little careful research lead me to www.dedemed.com a great collection of demonstration videos by Dede on cooking Mediterranean foods.  Her recipes are simple and very authentic.  The following recipe is her version of chicken shawarma.  My variation is to use boneless dark thigh meat instead of chicken breasts, marinating is longer (8+ hours) and grilling it until done.  Yummm!  The garlic sauce (homemade garlic mayo) is a MUST.

2 boneless (skinless) chicken breasts, cut into thins strips
1/4 cup lemon juice
1/4 cup Mediterranean (Greek) yogurt
1 tbs minced garlic
1 tsp salt
1/4 tsp ground cardamom
1/4 tsp 7 spices (found in Arabic food stores or make it at home yourself)
1/4 tsp paprika
1/4 tsp dried parsley
1/8 tsp cayenne pepper
1/8 tsp cinnamon
3 tbs olive oil
Pita, kabees(pink pickled turnips), pickles and garlic sauce for sandwich.

Combine all ingredients in a large bowl, cover and let marinate for 2 hours in the refrigerator. Preheat pan and add 3 tbs olive oil, add chicken and let cook for 10 minutes until chicken browns, cook for an additional 2 minutes if necessary to brown. To make sandwich, use pita bread, spread garlic sauce (use the link or buy some locally) on pita, add chicken, kabees and pickles (you can add tomatoes and lettuce if desired). Roll sandwich and press in the grill press to make sandwich crispy for 3 minutes. Enjoy with fries or salad.

September 18, 2010

Hummus

If there is such a thing as "Arab America", Dearborn, Michigan may be the closest thing it has to a capital. Twenty-two years ago, our first apartment was an extremely small upper flat located on it's eastside. Shawarma, kibbeh,  tabouli, and hummus was always nearby, fresh, and delicious.  Arabic food is still one of our favorite ethnic cuisines.  I experienced some sticker shock last week when I bought a "cheap" brand of garlic hummus (for close to $6.00/lb) at the grocery store. Wow! I used to be able to get superior stuff from any local Middle Eastern restaurant but now none are conveniently close enough.  I remember a recipe my brother Bob once made for us that was tons better than what came out of the plastic tub, so I called him to re-check the recipe.  He came through with this one ~ simple, inexpensive (about half the price) and very, very, good!  This recipe was given to him over twenty years ago from a friend who was born in Iraq. It is exactly the way his family made it in Bagdad. Garlic lovers (like my family) can step it up with an additional clove or two if they dare.  (And if you are anywhere near my old neighborhod in east Dearborn, the absolutely best pita in the world comes from the New Yasmeen Bakery on Warren Avenue.)

2 - 16 oz. cans chick (garbanzo) peas
3 tablespoons tahini (sesame seed paste)
¼ cups olive oil
⅓ cup (or less to taste) lemon juice
1 teaspoon salt
¼ teaspoon pepper
1 clove garlic (or 2 if you like more)

Drain chickpeas but reserve some of the liquid. Blend ingredients in food processor or blender. Add enough reserved liquid to bring to desired consistency. More lemon juice may also be added to taste. Spread the hummus on a shallow platter, drizzle it with good extra virgin olive oil and serve it along with pita bread and thinly sliced onions

April 25, 2010

Pysanky Joe’s Pierogi

For many years, my wife has admired the beautifully decorated Easter eggs many Easter European cultures produce; so when our local adult education catalogue offered a class in decorating Pysanky Easter eggs she jumped at the chance.  The class was taught by Joe, a pastry chef in Detroit that learned the traditional craft from his grandmother.  Since he had no children of his own, he felt teaching others was his way of passing on his Polish heritage to future generations.  He also taught a Pierogi making class for the same reason and, of course, my wife signed me up for it immediately.  Joe said this recipe isn’t strictly “traditional” but they are  fairly easy to make and wonderfully delicious.  The potato-cheese filling is his recipe, the kapusta (sauerkraut) came from my sister-in-law, and the blueberry recipe is from my mom.
   
Joe’s Pierogi Dough
1 package (8 oz) cream cheese
1 stick butter
5 C flour
1 egg
Pinch of salt
½ C+ hot water

Cut-blend the cream cheese, butter, flour and salt in a bowl using two butter knives or a pastry blender. Add the egg then gradually add the hot water until the smooth ball is formed.  Cover and let it rest for 10 minutes.
Roll out thin and cut circles using a biscuit cutter or the top of a large drinking glass.  Fill each circle with your choice of fillings, wet the edge of the circle with water and bring the two edges together and pinch to make sealed pocket.
In a large pot bring salted water to a boil then slide 6-8 pierogi at a time, leaving them in until they float to the top (2 minutes).  Retrieve each from the water with a slotted spoon and place on a wire rack until cool enough to eat or fry in a pan with a little butter. They can also be completely cooled, sprayed with a non-stick spray and frozen for later use.  Makes up to 4 dozen (depending on size.)

Potato-Cheese Filling
3 large onions
2 (yes 2) sticks of butter
8 lbs of potatoes
½ brick Velveeta cheese
Salt and pepper
Boil potatoes until soft, chop onions and saute them in the butter until soft.  Cut up the cheese into cubes and melt them into the butter/onion mixture.  Blend this into the potatoes and mash/blend it all until smooth.  Salt and pepper to taste.  This will make a TON of filling.

Kapusta (Sauerkraut) Filling
1 stick butter
1 large onion, chopped
1 jar sauerkraut, rinsed and drained
8 oz of mushrooms roughly chopped into pieces
1 C sour cream
Salt and pepper
Fry the onions in the butter until soft. Add the mushrooms, then the kraut, sour cream, salt and pepper and simmer for a hour.  Eat it as a side disk with kielbasa or use it as perogi filling.

Blueberry Filling
2/3 cup granulated sugar
1 tbsp. all purpose flour
2 cups blueberries
Whisk together sugar and flour; set aside. Fill each round with about 1 tsp. flour/sugar mixture and 5-6 blueberries. Pull dough over filling; pinch edges together to seal.

February 26, 2010

Bruce Bogtrotter's Over-the-top Decedent Chocolate Cake

Bruce Bogtrotter was the little boy that stole a piece of chocolate cake from the Trunchbull in Roald Dahl’s book, Matilda. As punishment, he then had to consume an entire cake in front of the whole school! This is that delicious cake – a sinfully sweet, ‘flourless’ chocolate cake coated in a thick, rich, semisweet chocolate ganache icing that puts this dessert way-over-the-top as a decedent indulgence. From the cookbook - Roald Dahl's Revolting Recipes


- 8 ounces good–quality semisweet chocolate
- 1 ½ sticks (12 tablespoons) unsalted butter, softened
- 1 cup plus 2 tablespoons sugar
- ¼ cup all–purpose flour
- 6 eggs, separated, yolks lightly beaten

Ganache icing:
- 8 ounces good–quality semisweet chocolate (I always use Ghirardelli)
- 8 ounces heavy cream

1. Preheat the oven to 350°F.
2. Line the cake pan with wax paper and butter the bottom and sides of the paper.
3. Melt the chocolate in the microwave on low heat. Mix in the butter and stir until melted.
4. Transfer to a large bowl and add the sugar, flour, and lightly beaten egg yolks.
5. Whisk the egg whites until stiff. Gently fold half of the whites into the chocolate mixture, blending thoroughly, then fold in the remaining whites.
6. Pour the batter into the cake pan and bake for about 35 minutes. There will be a thin crust on top of the cake, and if tested with a toothpick the inside will appear undercooked (don't worry, the cake will get firmer as it cools). Remove from the oven, and let cool in the pan on a wire rack.
7. While the cake is cooling, make the icing. Melt the chocolate with the cream in a heavy–bottomed saucepan over lowest heat, stirring occasionally until the chocolate is fully melted and blended with the cream. Remove from heat and let cool slightly.
8. When the cake is cool enough to handle, remove it from the pan and discard the wax paper. The cake is prone to sinking slightly in the middle, so flip it upside down before icing by placing a plate on top and carefully turning over the cake pan and plate together.
9. Carefully spread the chocolate icing all over the cake with a spatula.

February 12, 2010

Bubble and Squeak

I ordered this as a side dish at English pub in Toronto once just because of the name. It is a traditional English recipe named for the sound it makes when you prepare it - the potatoes bubble as you boil them and the cabbage squeaks as you fry it.) It’s a delicious easy-to-make Monday side dish that uses Sunday (or St. Patrick’s Day) dinner’s left-over veggies. Ireland’s Colcannon is similar as is Rumbledethumps from Scotland. 


- 4 strips of bacon fried and chopped
- ½ cup onion, finely chopped
- 2-3 cups of leftover mashed potatoes
- ½ cabbage head (chopped)
- Salt and freshly ground black pepper

Fry the bacon in a large pan and set aside. Add the chopped onion and cabbage into the left-over drippings and fry gently for 3 mins or until soft. Add the potatoes and crumbled bacon turning over, ensuring it is thoroughly mixed and reheated.
You can serve it at this point but some would let it cool, press the mixture into patties and re-fry them in butter until they have a crispy crust. (I didn't say it was low calorie.)

February 8, 2010

The Frugal Gourmet's New York Cheesecake

From Jeff Smith's cookbook On Our Immigrant Ancestors: Recipes You Should Have Gotten from Your Grandmother. It's made in a flash using just a food processor and a springform pan. It's not the faciest or prettiest cheesecake I make, but it is quick, easy, and the most authentic New York style cheesecake I have ever tasted - and absolutely delicious.

- 1 cup graham cracker crumbs
- 3/4 cup sugar (1/4 c for crust and 1/2 c for cheesecake)
- 1/4 cup plus 2 tablespoons of melted butter
- 1&1/2 cups of sour cream
- 2 eggs
- 2 teaspoons vanilla
- 1 pound (2 packages) cream cheese (PHILADELPHIA® brand, of course )

Blend the cracker crumbs, 1/4 cup sugar and 1/4 cup melted butter, and line the bottom of an 8 or 9 inch ungreased spring form pan. Blend the sour cream, 1/2 cup sugar, eggs, and vanilla in a food blender for 1 minute. Add the cream cheese cut into smaller pieces. Blend until smooth. Pour 2 tablespoons melted butter through the top of the machine. Pour into the spring-form pan. Bake in the lower third of a 325 degree oven for 45 minutes.
When baking is finished, remove from oven, and turn oven on to broil. Broil the cheesecake just until the top begins to show attractive spots of brown. Watch it closely - it doesn't take long.  Refrigerate for at lease 4 hours (or better overnight) before cutting and serving.

January 19, 2010

Taco-Chili Mac and Cheese

This one came from my dad.  He loved cook books.  He had many in his kitchen and he read them all.  He read them, but never USED them.  And although Dad did a majority of the cooking at our house while Mom worked the day shift, he was not known for his epicurean flare. (Ask any of my brothers about his V-8 and honey flavored spaghetti sauce.)  This one, however, he got right.  It's a typical casserole (hot dish) that feeds a lot, fills you up, and tastes yummy.


- 1 lb. macaroni
- 1 lb. hamburger
- 1 packet taco seasoning
- 1 cup of water
- 1 can chili beans with sauce (large or small, mild or hot)
- 1 jar of Cheese Whiz
- 1 bag corn chips (I always use FRITOS® Original)
Cook the macaroni according to package directions in a large pot. Drain, then put the pasta back into the pot. Brown the hamburger in a separate pan, add the taco seasoning and water and stir until thickened.
Add the taco-hamburger to the macaroni. Add the can of chili beans and heat the entire mixture.
Just before serving add the jar of Cheese Whiz and mix in thoroughly. Serve in bowls with crunched Fritos chips on top. Makes 8-10 servings.

January 4, 2010

Nebraska Runzas

We have several on staff that hail from the Great Plains area of our country.  I learned about runzas from them.  I call them the Nebraska version of a Michigan pasty.  I happen to like runzas better. Their called bierochs if your from Kansas. They are a meaty filling wrapped in a sweet roll bread.  I add cheese too.  They can be frozen for later easy lunching.  The original recipe is from Leslie at Kitchen Gifts.com

Dough:
• 2 pkg. Active dry Yeast
• 2 cups warm milk
• 1/2-cup sugar
• 1/2 t. salt
• 2 eggs - beaten
• 1/2 cup shortening, margarine or unsalted BUTTER!
• 7 to 8 cups all-purpose flour
Put yeast and milk in a bowl. Let it sit for 5 minutes. Add sugar, salt, eggs and softened butter. Mix together.
Gradually add flour while mixing. Add flour until dough pulls together into a ball. Knead for 4 or 5 minutes or until dough is smooth. (I use a free-standing mixer with a dough hook)  Put in a greased bowl, cover with a towel and allow to rise until double. Punch down and let it rise again. Remove dough from bowl and divide into thirds. On a floured surface, roll one portion of the dough to 1/4” thickness. Cut into 5"or 6” squares.
(Reserve dough you cut off to re-roll.) Give each square an extra roll with the rolling pin before filling.

Filling:
• 2 lbs ground beef
• 1 head of cabbage – finely shredded
• 1 medium onion - chopped
• Lots of salt and pepper
• 1 brick of VELVEETA cheese (used during the assembly)
Brown ground beef. Add shredded cabbage and cook over medium heat until cabbage is softened. Add salt and pepper to taste. It takes a lot! Start this about halfway through the second rise of the dough. Set aside until the dough is ready.

Making the Runzas (Bierochs):
Place a ¼“ slice of Velveeta cheese in the center of each dough square then put a large mound of filling on top. Pull opposite corners of the dough together and pinch to hold. Pull the opposite two corners together pinch then use your fingers to pinch all edges together to seal in filling. Turn runzas (bierochs) over and put on a cookie sheet lined with parchment paper (helps to keep any leakage from sticking to your cookie sheet)
Space the runzas (bierochs) about 1 inch apart. When cookie sheet is full put a towel over it and let it rise for about 15 minutes.
Bake runzas (bierochs) in a 350 degree oven for 20 to 25 minutes – until they are a deep brown.
Remove from oven and rub butter on the top of each. Cool on cooling rack or eat them now! Runzas (bierochs) can be cooled and then frozen. To reheat just put one in the microwave for one minute.

For a GREAT variation try this one from my teacher, my friend and my life-long mentor (who grew up in Nebraska), The Iron Duke:

Use the above recipe with the following changes:
Make a half batch to make 12 Runza and make the filling instead:
·   1 lb. Italian Pork Sausage.
·   One large onion (chopped)
·   A large can of sauerkraut-well washed, drained, and chopped.
·   ½ cup of Honey mustard

·   Use slices of sharp cheddar instead of Velveeta